
instructions for vinyl decal application
Vinyl decals are transforming spaces, offering vibrant floor graphics and personalized vehicle customization, becoming increasingly popular for impactful visual communication and self-expression.
What are Vinyl Decals?
Vinyl decals are essentially graphics designed and cut from self-adhesive vinyl material. They’re incredibly versatile, ranging from simple shapes and lettering to complex, multi-colored designs; These aren’t just stickers; they’re durable, weather-resistant solutions for decoration and advertising.
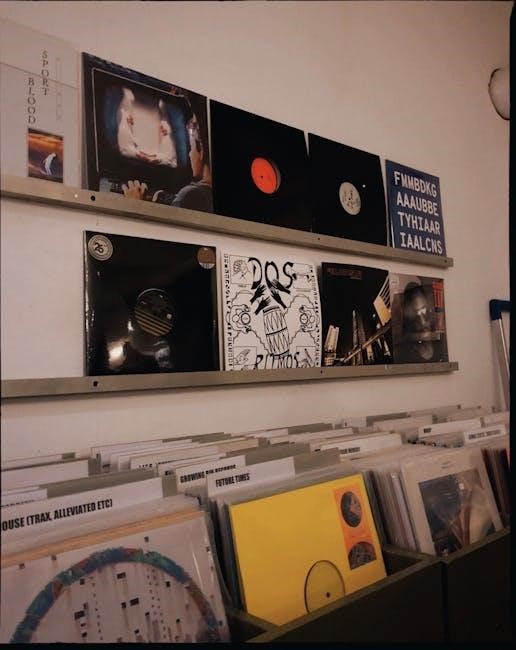
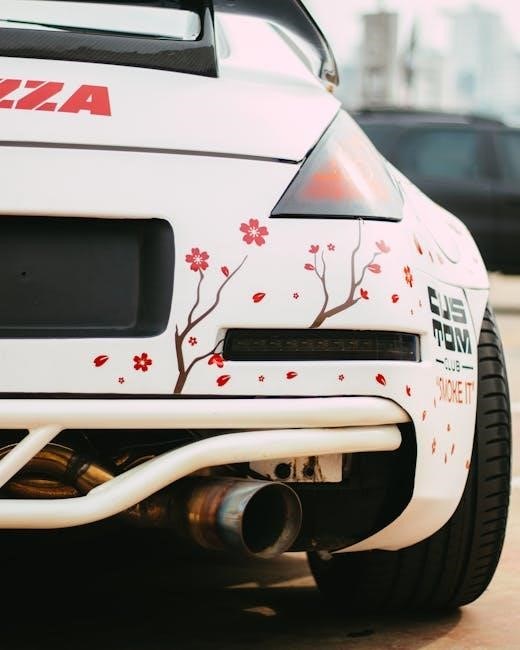
You’ll find them utilized extensively for floor graphics in retail spaces, drawing the eye and guiding customers. Vehicles benefit from car decals, allowing for unique personalization and branding; The vinyl itself comes in various finishes – matte, gloss, transparent – offering aesthetic flexibility.
Essentially, a vinyl decal is a powerful tool for visual communication, capable of transforming surfaces and conveying messages effectively, whether it’s a playful design or a professional advertisement.
Why Choose Vinyl Decals?
Vinyl decals offer a compelling blend of affordability, durability, and aesthetic appeal. Compared to traditional signage or painting, they present a cost-effective solution for impactful visual communication. Their weather-resistant nature makes them suitable for both indoor and outdoor applications, ensuring longevity.
The ability to customize designs – from simplistic patterns to intricate artwork – allows for unique self-expression, particularly with car decals. Floor graphics created with vinyl are attention-grabbing in retail and event settings.
Furthermore, vinyl decals are relatively easy to apply and, when needed, can be removed without damaging the underlying surface, offering flexibility and convenience.
Tools and Materials Needed
Successful application requires quality vinyl, a squeegee, transfer tape, cleaning solution, a smooth edge for burnishing, and potentially a heat gun for complex installs.
Decal Options: Types of Vinyl
Choosing the right vinyl is crucial for a lasting and visually appealing decal. Calendered vinyl is a cost-effective option for short-term applications, like temporary car graphics or indoor displays, offering good conformability. However, it’s less durable against harsh weather.
Cast vinyl, conversely, is manufactured differently, resulting in superior dimensional stability and longevity. This makes it ideal for long-term applications, especially on vehicles, where it can withstand temperature fluctuations and UV exposure without shrinking or cracking.
Specialty vinyls, like reflective or translucent options, cater to specific needs. Reflective vinyl enhances visibility at night, while translucent vinyl creates unique effects on windows. Consider the application environment and desired lifespan when selecting your vinyl type.
Essential Application Tools
Successful decal application relies on having the right tools readily available. A squeegee, preferably with a felt edge, is paramount for smoothing the vinyl and eliminating air bubbles during application. Application gloves prevent fingerprints and oils from contaminating the adhesive surface.
A sharp craft knife or scalpel is essential for precise trimming and weeding excess vinyl. Masking tape helps position the decal accurately and secure it during the process. A spray bottle filled with a mild soap and water solution aids in repositioning and bubble removal.
Finally, a clean lint-free cloth is vital for wiping down surfaces and ensuring a pristine application. Investing in quality tools will significantly improve the outcome and longevity of your vinyl decals.

Surface Preparation is Key
Proper surface prep ensures optimal adhesion and a lasting, professional finish for your vinyl decals, maximizing their visual impact and durability.
Cleaning the Application Surface
Thorough cleaning is paramount before applying any vinyl decal. Begin by removing loose dirt, dust, and debris with a soft cloth or brush. Next, utilize a mild detergent mixed with warm water to wash the surface, effectively eliminating grease, grime, and any lingering contaminants.
Avoid harsh chemicals or abrasive cleaners, as these can damage the surface and hinder adhesion. After washing, rinse the area completely with clean water to remove any soap residue.
Crucially, ensure the surface is completely dry before proceeding with the application process. A clean, dry surface guarantees a strong bond between the vinyl and the application area, contributing to a professional and long-lasting result.
Ensuring Surface Smoothness
Surface texture significantly impacts vinyl decal adhesion and overall appearance. Before application, carefully inspect the intended surface for any imperfections like bumps, ridges, or unevenness. Minor imperfections can sometimes be addressed with light sanding, creating a smoother base for the decal.
For textured surfaces, consider if the decal will adhere properly; some textures may require specialized vinyl formulations. It’s vital to avoid applying decals to crumbling or flaking paint, as this will compromise the bond.
A smooth, consistent surface ensures full contact between the vinyl adhesive and the material, preventing bubbles and wrinkles, and maximizing the decal’s longevity and visual appeal.
The Application Process: Step-by-Step
Begin by carefully peeling the backing paper, precisely positioning the decal, and then smoothly applying it with a squeegee for a flawless finish.

Peeling the Backing Paper
Initiating the application requires careful separation of the vinyl decal from its backing paper. This step demands patience and a steady hand to prevent tearing or folding the design. Begin by gently lifting a corner of the backing, using your fingernail or a plastic scraper.
Slowly and deliberately peel the backing away at a 45-degree angle, ensuring the vinyl remains adhered to the clear transfer tape (if applicable). If the decal starts to lift with the backing, gently press it back down. For intricate designs, consider peeling back only a small section of the backing at a time, applying the decal as you go.
Avoid rushing this process, as a cleanly separated decal is crucial for a successful and bubble-free application. A smooth, controlled peel sets the stage for accurate positioning and a professional-looking result.
Positioning the Decal Correctly
Precise placement is paramount for a visually appealing outcome. Before fully applying the decal, carefully position it on the prepared surface. Utilize a ruler or measuring tape to ensure accurate alignment, especially for symmetrical designs or multiple decals.
Step back and assess the overall look from a distance, making adjustments as needed. Consider the surrounding environment and how the decal will integrate with it. For larger decals, it can be helpful to have a second person assist with holding and aligning the design.
Once you are satisfied with the positioning, lightly tack down one edge of the decal with tape to secure it, preventing unwanted movement during the application process.
Applying the Decal with a Squeegee
With the decal positioned, begin applying it using a squeegee. Start from the center and work outwards, applying firm, even pressure. This action expels air bubbles and ensures full adhesion to the surface. Overlap each stroke slightly to avoid leaving any gaps or wrinkles.
Employ a gentle, consistent motion, avoiding excessive force that could damage the vinyl. For intricate designs, use the squeegee at varying angles to reach all areas effectively. Regularly check for bubbles or areas that aren’t adhering properly, addressing them immediately.
Continue until the entire decal is firmly pressed onto the surface, creating a smooth, seamless finish.
Dealing with Bubbles and Wrinkles
Bubbles and wrinkles can occur during application; identifying their type is crucial for effective removal, ensuring a flawless and professional-looking vinyl decal installation.
Identifying Bubble Types
Successfully removing bubbles begins with understanding their origin. Air bubbles, trapped underneath the entire decal, often appear immediately after application and are usually larger in size. These typically result from an improperly cleaned surface or insufficient pressure during squeegeeing.
Silver bubbles, conversely, are smaller and appear silvery due to air trapped within the vinyl itself, frequently caused by applying decals to textured surfaces. Wrinkles, resembling folds in the vinyl, often stem from attempting to apply the decal to curved surfaces or stretching the material excessively.
Distinguishing between these bubble types is vital; air bubbles require lifting and re-applying, while silver bubbles may necessitate a heat gun for manipulation. Addressing wrinkles often involves carefully lifting and smoothing the affected area.
Techniques for Removing Bubbles
For air bubbles, gently lift the decal’s edge closest to the bubble using a fingernail or application tool; Carefully smooth the vinyl back down, working from the center outwards to avoid trapping more air. Consistent pressure with a squeegee is crucial during this process.
Silver bubbles are trickier. A heat gun, used cautiously on a low setting, can soften the vinyl, allowing the air to escape. Hold the heat gun several inches away and move it constantly to prevent damage. Puncturing small silver bubbles with a fine needle can also release the trapped air, followed by smoothing.
Always work slowly and methodically, re-inspecting the area after each attempt to ensure complete bubble removal and a flawless finish.
Addressing Wrinkles and Creases
Minor wrinkles often resolve themselves within a few days as the vinyl acclimates to the surface. However, for persistent creases, gentle heat can be your ally. Employ a heat gun on a low setting, moving it continuously to avoid melting or warping the vinyl.
Apply even pressure with a soft cloth while heating, encouraging the vinyl to relax and conform to the surface. Avoid excessive heat, which can damage the adhesive. For stubborn wrinkles, carefully lift the decal section, re-position, and re-apply, ensuring a smooth base.
Patience is key; work slowly and methodically for optimal results, achieving a professional and seamless application.
Post-Application Care and Maintenance
Allow decals ample time to fully cure, avoiding harsh cleaning products initially. Gentle cleaning with mild soap and water preserves vibrant colors and longevity.
Allowing Sufficient Curing Time
After applying your vinyl decal, resisting the urge to immediately test its durability is crucial. The adhesive needs time to bond fully with the application surface, a process known as curing. This period varies depending on the vinyl type and environmental conditions, typically ranging from 24 to 72 hours.
During this curing phase, avoid applying excessive pressure or scrubbing the decal. Refrain from exposing it to extreme temperatures or direct sunlight, as these can hinder the bonding process. Protecting the decal from moisture is also important. Allowing sufficient curing time ensures optimal adhesion, preventing premature peeling or bubbling, and maximizing the lifespan of your beautifully applied vinyl design.
Cleaning Vinyl Decals
Maintaining the vibrancy of your vinyl decals requires gentle cleaning practices. Avoid harsh chemicals, abrasive cleaners, and scouring pads, as these can damage the vinyl’s surface and fade the colors. Instead, opt for mild soap and warm water.
Use a soft cloth or sponge to wipe the decal in a circular motion, removing dirt and grime. Rinse thoroughly with clean water and gently pat dry with a microfiber towel. For stubborn stains, a small amount of isopropyl alcohol can be used cautiously. Regular, gentle cleaning will preserve the decal’s appearance and ensure it continues to enhance your space for years to come.
Troubleshooting Common Issues
Addressing application challenges like poor adhesion or tearing is crucial for successful results; heat and careful handling can often resolve these frustrating decal problems.
Decal Won’t Stick
A frustrating issue! If your vinyl decal refuses to adhere, several factors might be at play. Insufficient surface preparation is a primary culprit – ensure the application area is thoroughly cleaned and free of any contaminants like dust, grease, or wax.
Temperature matters; applying decals in very cold or humid conditions can hinder adhesion. Consider using a heat gun or hairdryer on a low setting to gently warm the surface and the decal itself, improving tackiness.
Vinyl quality also plays a role. Older or lower-grade vinyl may have a weakened adhesive. Finally, confirm the surface isn’t coated with a silicone-based product, as these repel adhesives. A quick test with isopropyl alcohol can help identify silicone.
Decal is Tearing During Application
Tearing is a common concern, especially with intricate designs. Often, this happens when the vinyl is stretched excessively during the peeling or positioning process. Slow and deliberate movements are crucial; avoid rushing.
Temperature can contribute – cold vinyl is less pliable and more prone to cracking. Gently warming the decal with a hairdryer can increase its flexibility. If the decal is large, work in smaller sections to maintain control.
The type of vinyl also matters; thinner vinyls are more susceptible to tearing. Ensure you’re using a quality vinyl appropriate for the design’s complexity and the application surface.

Advanced Techniques
Mastering larger decals and layering requires precision and patience, elevating your projects with complex designs and visually stunning, customized applications.
Applying Large Format Decals
Tackling expansive vinyl decals demands a strategic approach, differing from smaller applications. Begin with a thoroughly cleaned and smooth surface, crucial for adhesion. Employ the hinge method – partially apply the top edge, then slowly lower the decal, using a soft squeegee to eliminate bubbles.
Teamwork is often beneficial, with one person guiding the decal and another smoothing. For exceptionally large formats, consider sectioning the design for easier handling. Regularly check alignment to prevent costly errors. Patience is paramount; rushing can lead to wrinkles or bubbles that are difficult to rectify. A heat gun, used cautiously, can aid in conforming the vinyl to contours.
Layering Vinyl Decals
Creating multi-layered designs with vinyl decals adds depth and complexity to your projects. Start with the base layer, ensuring it’s firmly adhered and bubble-free. Subsequent layers should be slightly smaller, allowing the base color to subtly frame them. Precise alignment is critical for a polished look.
Use transfer tape for each layer, carefully positioning and smoothing each addition. A squeegee is essential for eliminating air pockets between layers. Consider the vinyl types – ensure compatibility to avoid peeling or lifting. Patience and a steady hand are key to achieving a professional, visually striking layered effect.
Removing Vinyl Decals
Gentle heat softens the adhesive, facilitating easier peeling. Removing any remaining residue requires appropriate solvents, preventing damage to the underlying surface.
Using Heat for Easier Removal
Applying heat is a cornerstone of successful vinyl decal removal, significantly softening the adhesive bond without causing immediate damage to the surface below. A common method involves using a hairdryer on a low to medium setting, directing the warm air across the decal for approximately 30-60 seconds.
Be cautious not to overheat, especially on sensitive materials like painted surfaces or plastics, as excessive heat can lead to discoloration or warping. Alternatively, a heat gun can be used, but with even greater care and distance to avoid scorching. As the adhesive warms, gently attempt to lift a corner of the decal with a plastic scraper or fingernail.
If resistance is met, continue applying heat and patiently work your way around the edges, gradually loosening the adhesive’s grip. This method is particularly effective for older decals where the adhesive has become more firmly set over time.
Removing Adhesive Residue
After decal removal, stubborn adhesive residue is a common issue, but thankfully, several effective solutions exist. Start with isopropyl alcohol (rubbing alcohol) applied to a clean cloth, gently rubbing the affected area in a circular motion. For more persistent residue, consider using a dedicated adhesive remover, always testing in an inconspicuous area first to ensure surface compatibility.
Alternatively, household oils like vegetable or olive oil can work wonders, softening the adhesive for easier wiping. Allow the oil to sit for a few minutes before gently scrubbing. Avoid abrasive cleaners or scouring pads, as these can scratch the underlying surface.
Finally, a clean, damp cloth should remove any remaining oil or residue, leaving a pristine surface ready for re-application or simply enjoying its clean state.